Examples

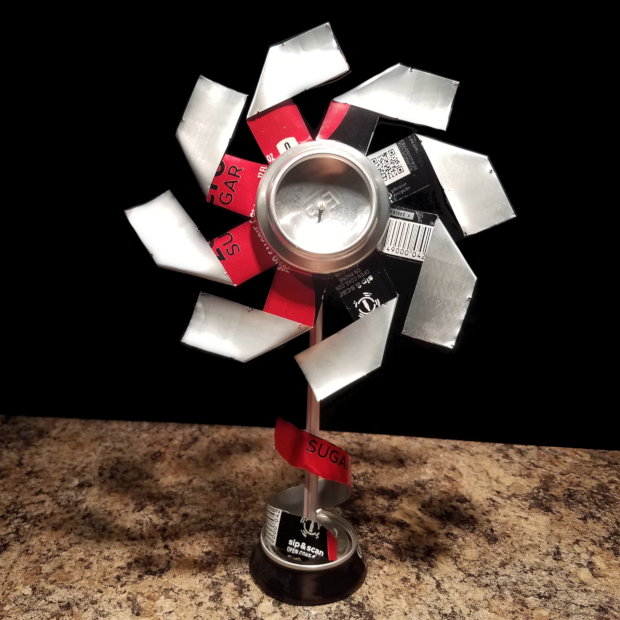

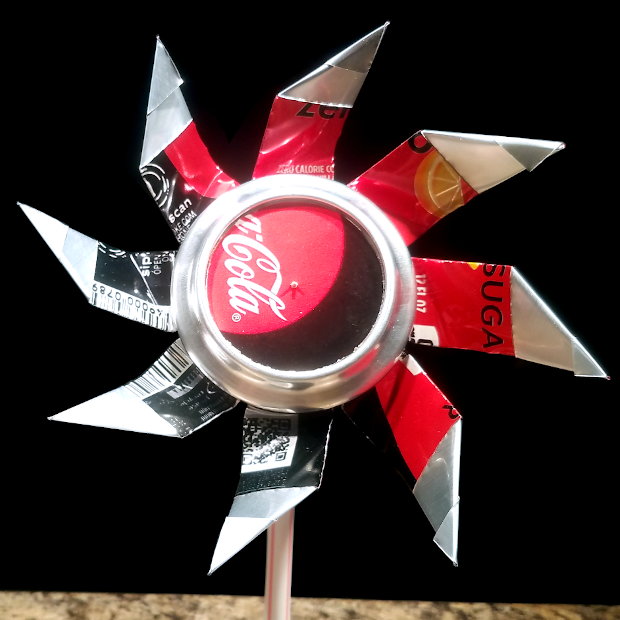
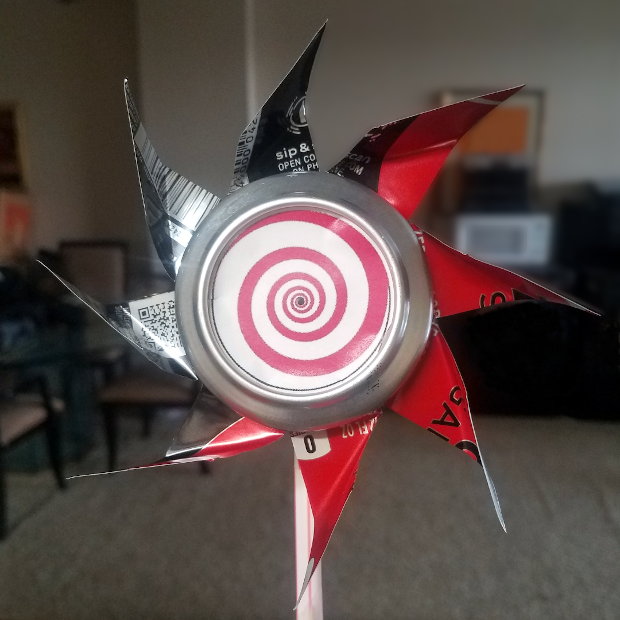

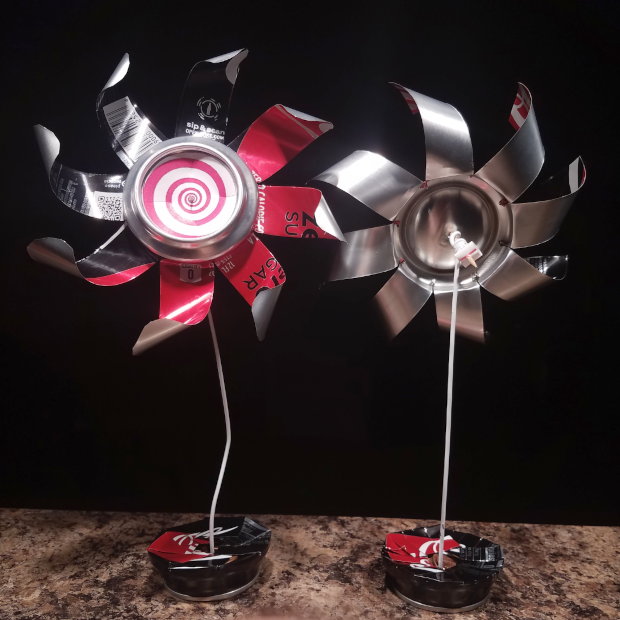
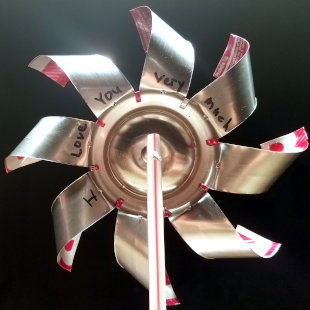
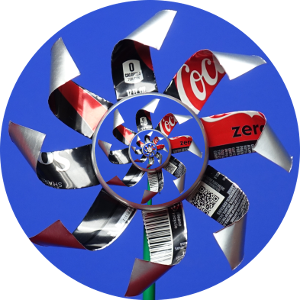
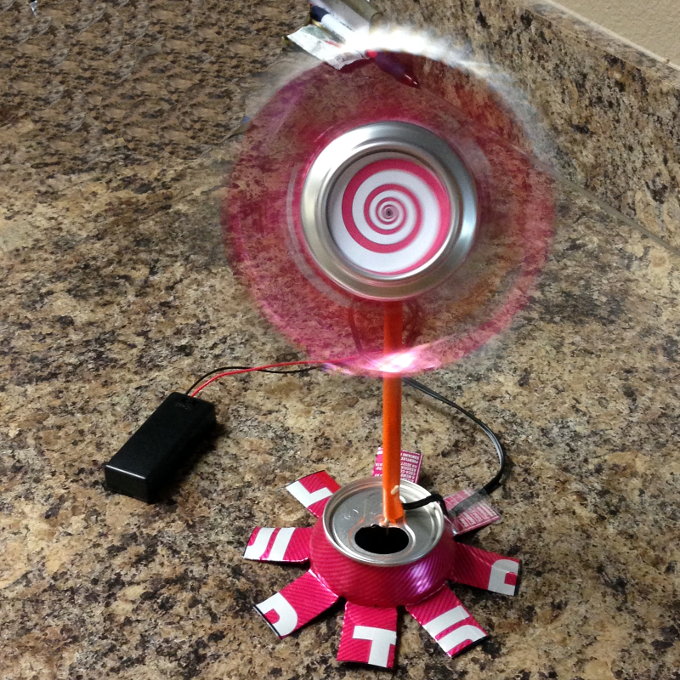
This pinwheel is the classic, retro fidget-spinner — with photos added for personality. Shiny, spinny things have fascinated me since I was born, and I'll never outgrow it. You need this dynamic desk toy.
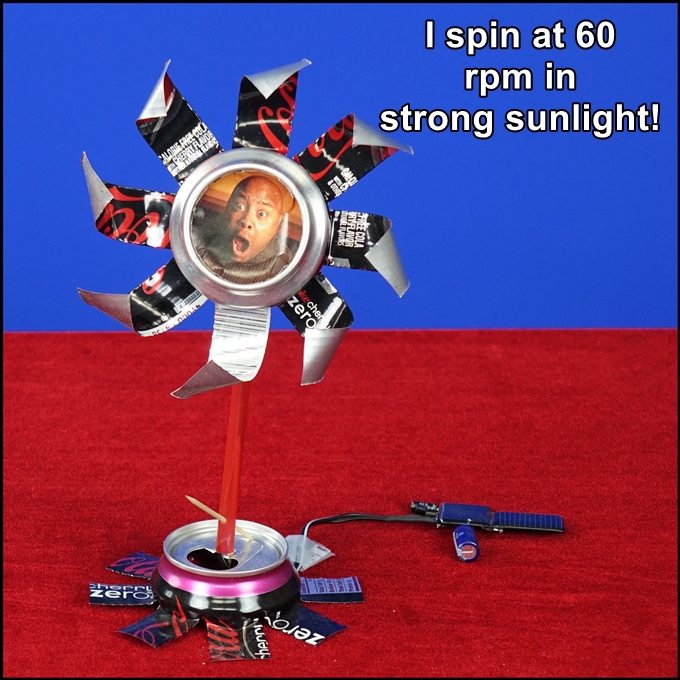
The pinwheel spins by breath, gusts of wind, air-conditioning, fans, or the twirl of a toothpick. Tekkies among you can add a pager motor and wire it to a battery or solar cell for added style. My solar pinwheel spins all day while the sun shines.
Transmogrifying cans into spinning pinwheels is a great party trick. I've spent entire airplane flights making them for the kids on the plane. The overhead air nozzle really sets it spinning.
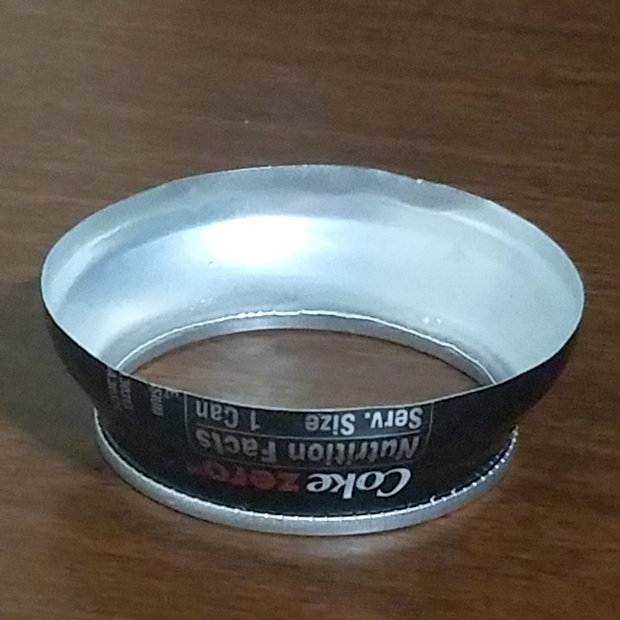
Scratch a Line. This "first" step is optional. Making the pinwheel as shown requires you to separate the can into two parts: the base (made from the top of the can) and the wheel (made from its bottom). If you want the "petals" at the base to be identical in length and the "arms" of the pinwheel to be identical in length, it helps to scratch a line around the circumference of the can. You will make this line before you cut the eight slots down the side of the can using the slider. After making the slots and removing the can from the sleeve, you will cut with scissors along the line you've drawn; this separates the can in two parts, the base and wheel.
To scratch the line, put the can partway into the sleeve. About the top third should be sticking up. The precise height doesn't matter, but obviously it affects the length of the leaves and the length of the arms. It helps to stick a pushpin into the side of the can at the holes in the top of the sleeve in order to anchor the can in place. This prevents the can from rotating, elevating, or decending in the sleeve as you scratch the line. Use a pushpin to scratch a line around the circumference of the can by dragging it along the circle where the can meets the upper ledge of the sleeve.
As an alternative, you can insert the can into the sleeve. Then hold the pushpin firmly in the upper corner of the third square hole from the top; then twist the can in the sleeve.
Sometimes, I'll just poke a pushpin hole in that upper left corner of the third square, lift the can so that the hole is at the edge of the upper lip of the Aluminator, then lock the Aluminator in place in several holes (at 120 degree angles around the circle), and then scratch my line.
Be firm in your scratching, since the whole point is to abrade away the epoxy-covered paint to expose the aluminum surface of the can. Remove the pushpin.
If you have a marker handy, you may prefer to draw the line rather than scratching it.
Make the Slots. Push the can fully into the sleeve. Rotate the can so that the hole you just made in the "Scratch a Line" step lies along a slot-edge that you're going to use. [This way, it will "disappear" when you make your slot over it.] Poke a pushpin into the side so that the can is locked into place. Make 8 slots, equidistantly placed around the can, as taught on the instructions page ("Slicing the Side").
Cut the Can. Use the line you scratched in step two to cut the can into two parts. If you skipped scratching the line, then estimate where the line would be and cut there. I find that, if I haven't scratched the line, my cuts are more accurate if I cut one panel, then cut three panels in the clockwise direction, then four panels in the counter-clockwise direction. This way, any drifting in my cut lines is minimized.
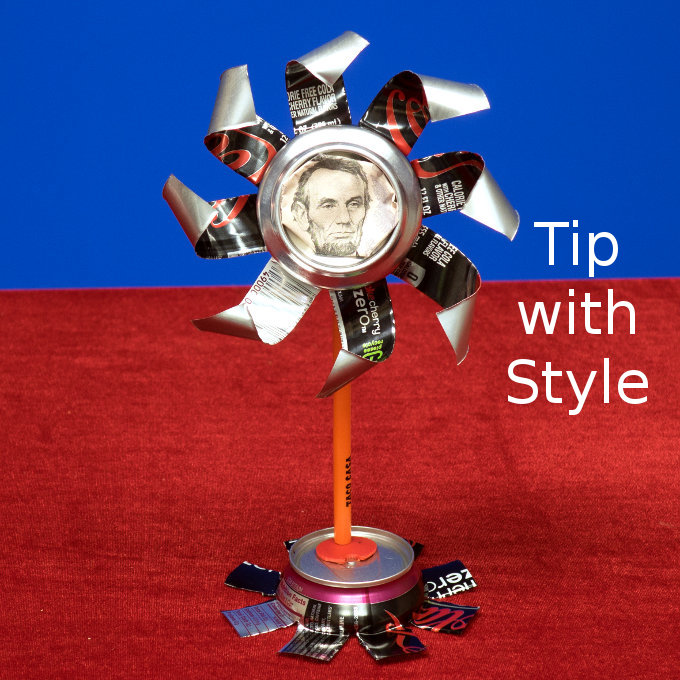
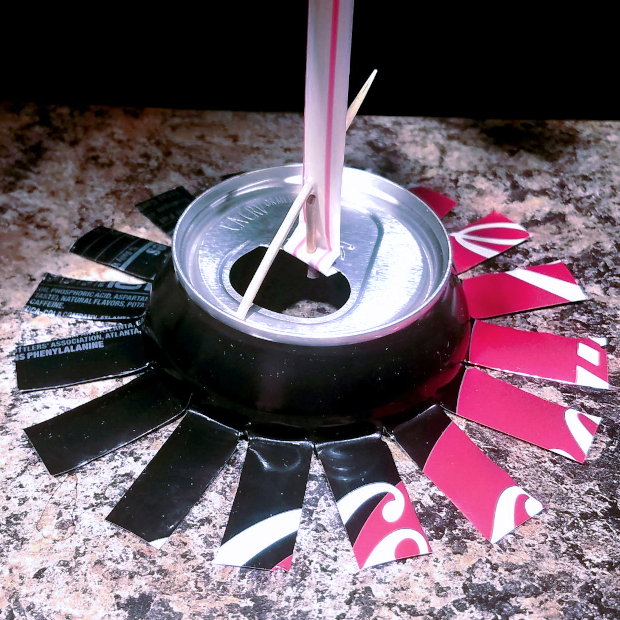
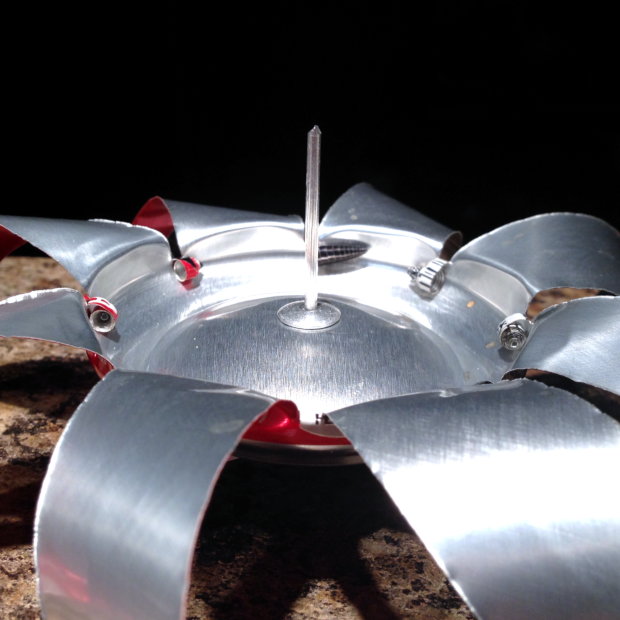
Make the Petals. The petals on the base serve both a functional and aesthetic purpose. The wider the base, the harder it is to tip it over. Since the can is lightweight, this adds important stability. Another trick for adding stability is to add weight by taping or glue-ing pennies to the underside of the lid.
Making perfect petals can be a bit tricky. By this, I mean that the trick is to apply pressure with one finger to a point in the center of the petal. This pressure point is just a few millimeters from the bottom, where the can's metal goes from being stiff to being flappy. The thumb then bends the petal down into a plane that is parallel to the can bottom or lid, as the case may be. I've learned where this point is by feel and practice, and you will too after making a few pinwheels and watching the videos.
Here's how to find the pressure/bending point if you're not sure where it is. Gently bend the top of the petal and then continue that curve downward until you feel the point where it resists curving. Then make a gentle fold right there. The videos above show this better process than I can describe it.
Obviously, you need to keep your thumb away from the edges of the petals as you curve them. If you're worried, wear gloves or a "thumble" on your thumb. Or wrap your thumb in tissues held in place with a rubber band.
If you find it difficult to make the petal-bends in the right place, you can shorten the bend-line by snipping its sides, which, by making the bend line itself shorter, will make it easier to bend the petal in that place.
This process is easier if, before making the petal-bends on the base, you cut each petal in half lengthwise, so that you have sixteen "leaves" spreading out from the center.
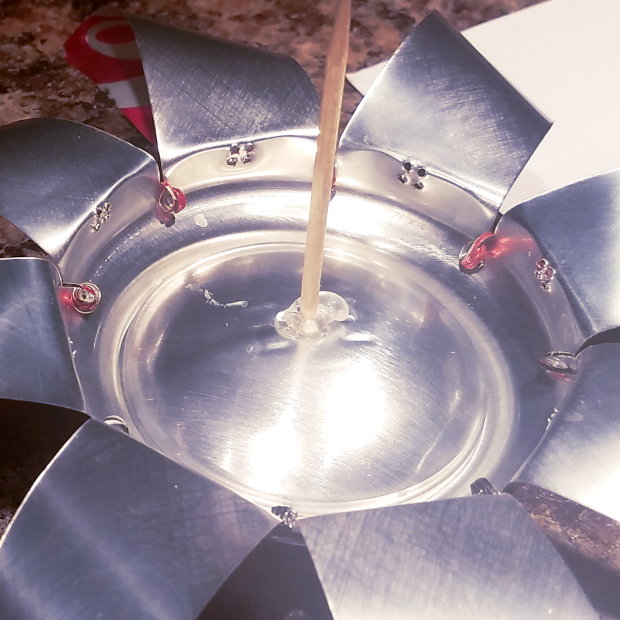
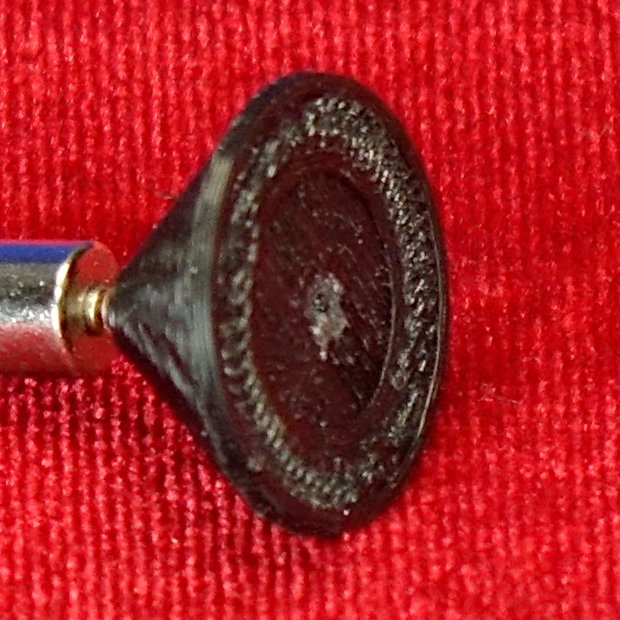
Make the Shaft. You can find the center of the can's bottom in two different ways. The easiest is to place the centerfinder wheel into the can so that its eight pips all touch the sides of the can. Then poke a hole in the can's center through the centerfinder wheel using a pushpin. The other is gently to place the tip of a pushpin at the spot where you think the center is, then rotate the can a bit while trying to hold the pushpin-tip in place. If the touch point rotates around in a circle, you've missed the real center. Repeat until you see no rotation, then poke that spot.
Enlarge the pushpin hole using the punch. If you're using the "question mark" punch, instead of a #17 wire brad nail, you'll need to enlarge the hole a bit by rotating the question mark punch in a small circle around its axis. Then shove your toothpick through the hole, making sure that the toothpick is sticking straight up. The toothpick should hold with a nice friction-fit, and the tip will project through the other side, giving you a sharp point with which to stab your photo.
A more durable alternative is to stick a pushpin through the center, then use that hole to install a rivet. This part of the Instructions tells you how to do that. The nice thing about this solution is that the post will always be pointing along the right axis, but the downside is that the rivet's mandrel is typically too short to allow you to spin the wheel manually — at least, not if you make the coffee-straw-bearing-shaft long enough. But who knows, maybe your fingers are tiny?
You can achieve fixed axial orientation with a glue gun, but it's tricky. It's easy to set it off-axis, and for maximum durability, you should glue both sides of the toothpick. This might interfere with your picure placement, though.
Make the Straw Stand. Instructions for making a stand for the straw are set out at length here. Please click the link to refer directly to those instructions.
Make the Spin Mount.
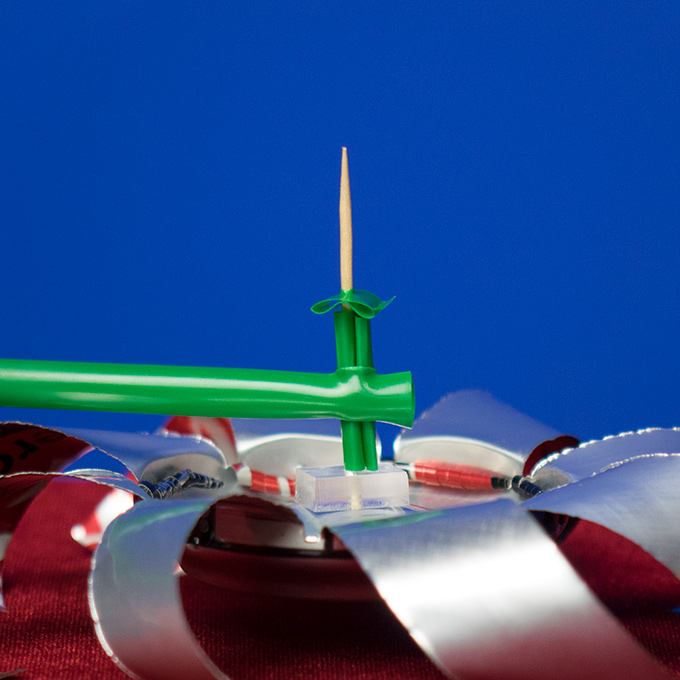
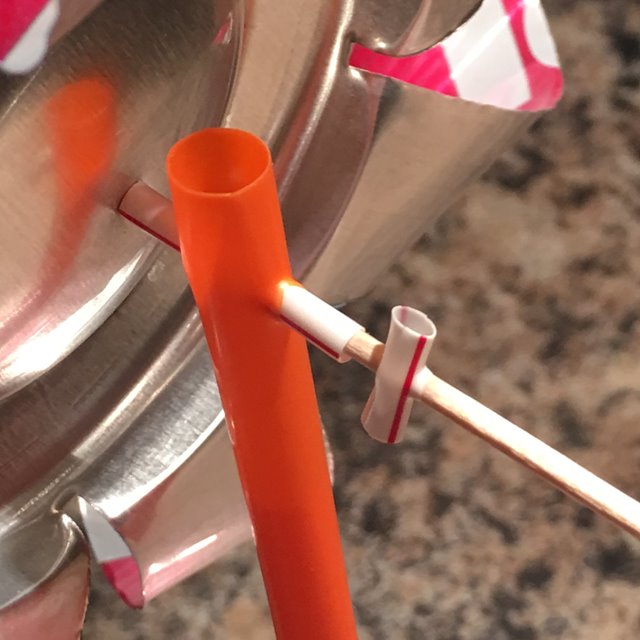
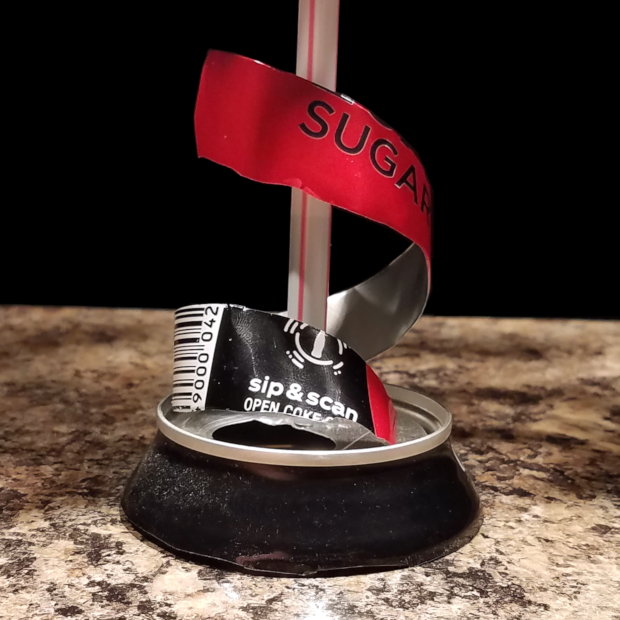
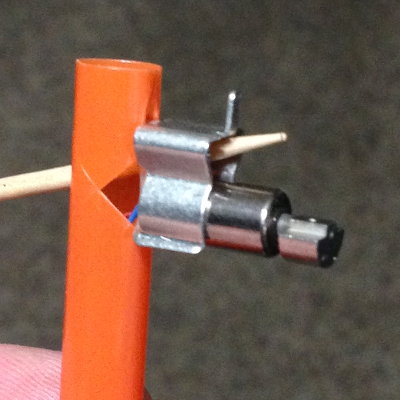
Make the spin mount by passing a pushpin through the straw at a 45 degree angle. (I like the look of the wheel tilting up slightly to face the observer.) Then push the slider through those holes by twisting it as you penetrate them. Then put a short section of coffee straw over a nail. [As an alternative to the coffee straw, you can cut off a short section of your straw, cut that lengthwise, roll it up, and use that as a substitute over the nail. If you don't have a nail handy, just roll the penetrating tip of the straw section into a bit of a long cone so it has enough rigidity to work.] Then push the end of the coffee-straw-covered-nail through the holes in the main straw. If you didn't make the 45-degree holes large enough, you may have to pinch the larger straw a bit to keep it from being crushed in by the force of the coffee-straw-covered-nail as it penetrates. If it hangs a bit on the back end of the main straw, making it difficult to push through, then you've done it right. After sliding the straw segment completely through the larger straw, pull out the nail. Then straighten out the rolled-up straw section if you went that route (since you probably had to make the end into a bit of a cone to get it to penetrate if you didn't use a nail).
As an alternative to using a nail, you can simply snip a horizontal cut in the places where the coffee straw segment will enter and exit the larger straw. Then pass the straw through the slots you made.
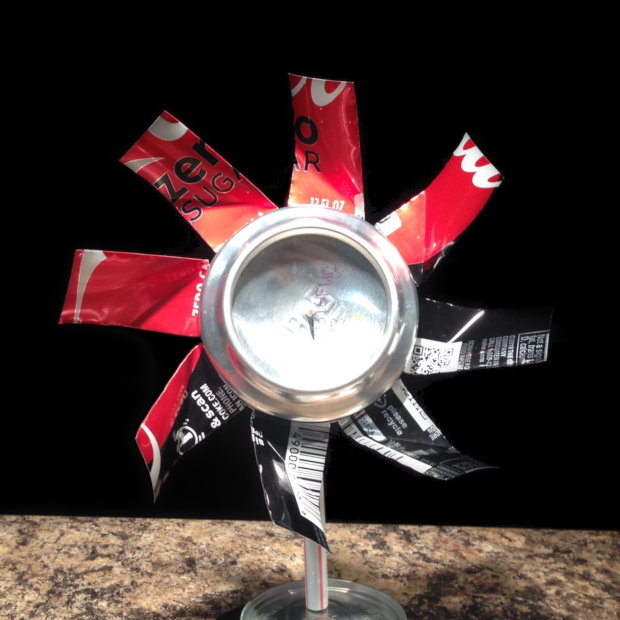
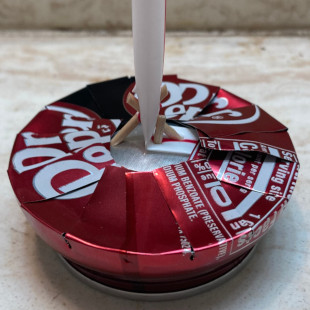
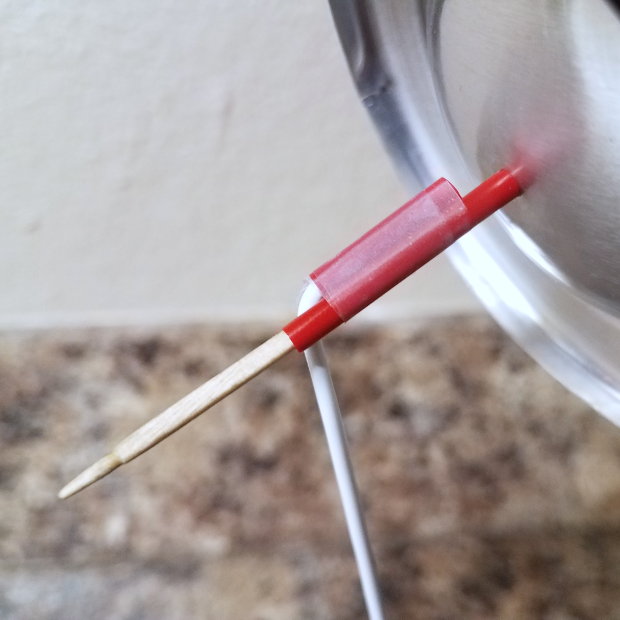
Slide the wheel's toothpick through the straw segment. To keep it from falling out, cut a small section of straw and pierce it perpendicularly with a pushpin. Shove that on the end of the toothpick up to the spin mechanism, but don't touch it against the coffee straw. If you do, the friction between them can prevent spinning. If you don't have a coffee straw, you can use a short, rolled-up or folded-up section of the larger straw, as shown in the photo above.
Other variants using wire supports made from twisted hangars, garden wire, jewelry wire, or paper clips are possible as well.
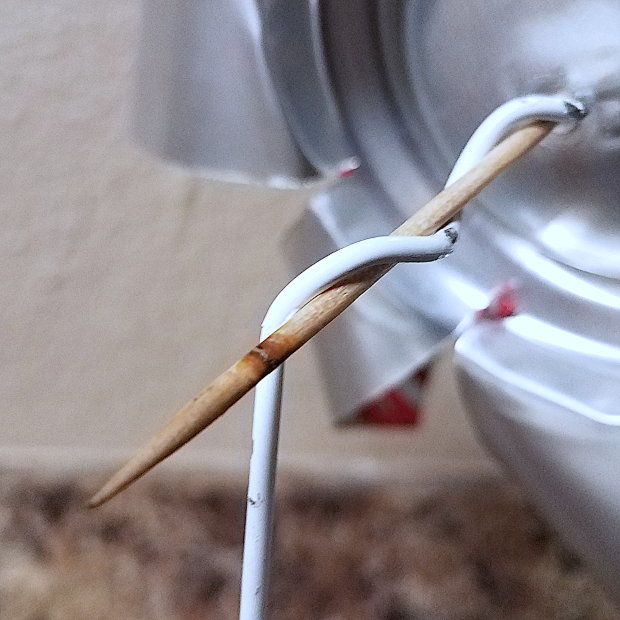
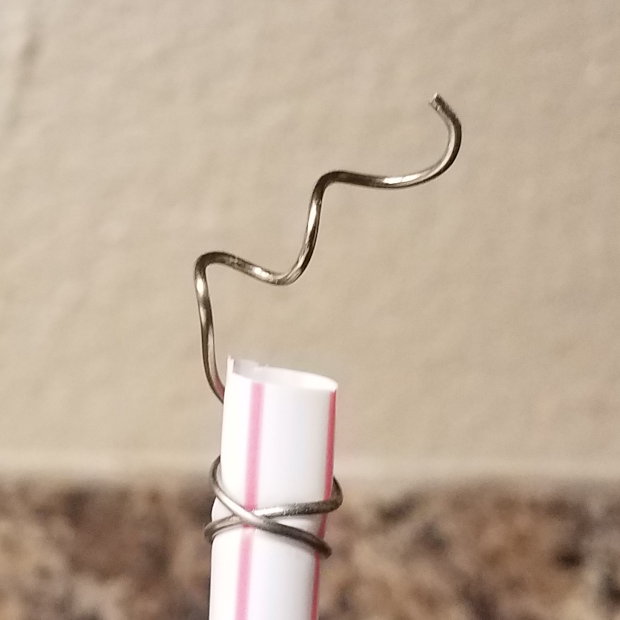
I made the wire supports by twisting the wire around the right-sized nail. For the paperclip version, I inserted a screw in the top of the straw, wrapped the wire around it, then unscrewed the screw to remove it. The third photo shows two segements of coffee straw taped together.
It can be difficult to maintain perfect axial alignment between the pinwheel head and the toothpick. If it gets off-kilter, the pinwheel head will wobble. I recommend 3D printing an alignment tool that can fit over the toothpick as you jam it into the can. It can be an applicator tool or a disposable piece that is locked to the pinwheel head with hot glue, superglue, adhesive putty, etc.

The bottom side of the aligner is curved to match the curvature of the can. The toothpick can later be knocked off its axis, but at least it'll be perfectly straight at the moment it's made.
Picture It. The centerfinder serves a dual purpose. Not only does it find the center of the can for spinning purposes (see the fidget spinner and the Canimation™), but you can use it to cut out images to place in the center of the pinwheel.
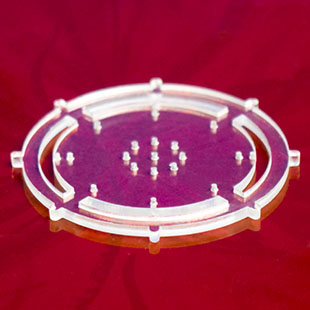
Just place the center finder on the magazine or photo image you want. Place the center hole of the center finder on top of the center of the desired point of rotation. Poke a small hole in the image with your pushpin. Use the curved slots in the center finder to draw cut-line borders in the image. Cut those lines you've drawn with scissors. I guess you could use a pushpin to scratch the image off the page by using the curved slots, but I've never gotten good results that way. Shove the toothpick tip through the center hole in the image and press it into place.
You can also easily make your own image cutter. Open the top with a can opener, then removethetop, and then trace around the inner circle with your pen.
Friction is usually strong enough to hold the picture in place. If a more permanent solution is desired, you can tape a bit of plastic straw (single layer) to the back side of the image over its centerpoint. But first pre-punch a hole in the plastic over the centerpoint so the toothpick can slide in easily and accurately.
Alternatively, you can tape the image in place with double-sided tape stretched across the bottom/dish. This method keeps the image flat and unsquished, which is a better effect.
Alternatively, make a loop of tape that will adhere to both the bottom of the can and the back of the image and work it into place as best you can.
I've gotten good results by cutting slits into the image at the 12:00, 3:00, 6:00 and 9:00 positions on the clock dial. These allow the picture to become bowl-shaped without distorting the image by wrinkling the paper.
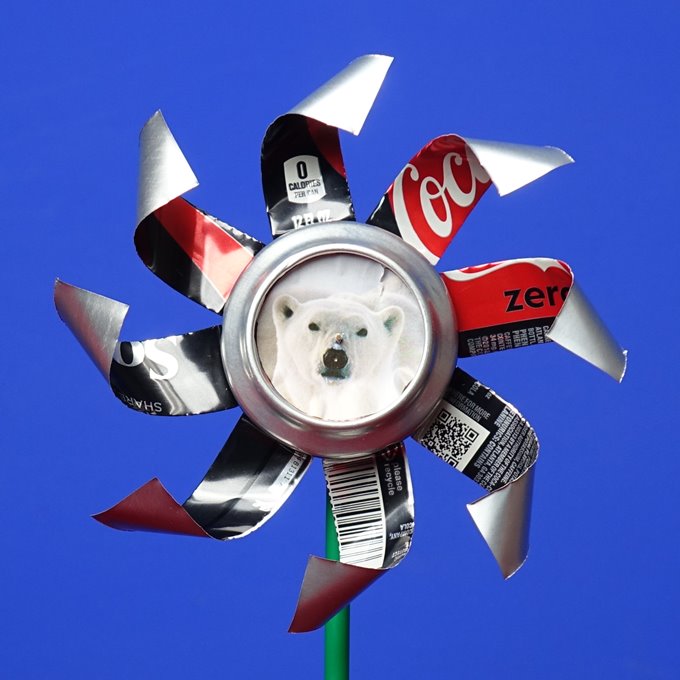
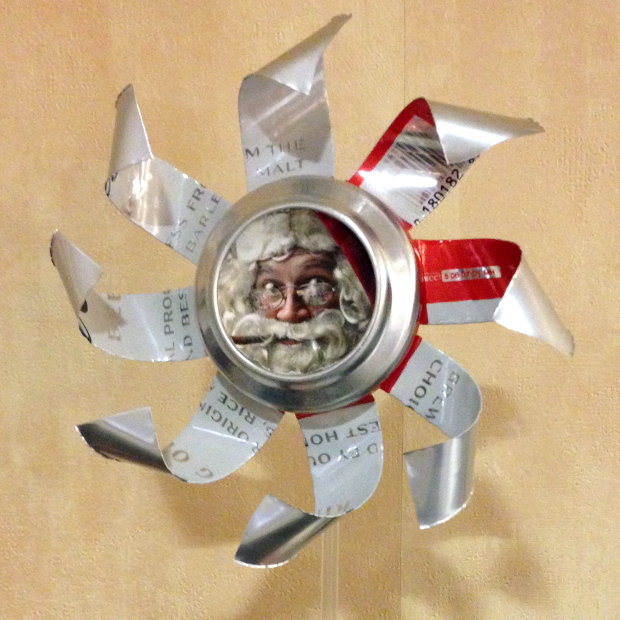
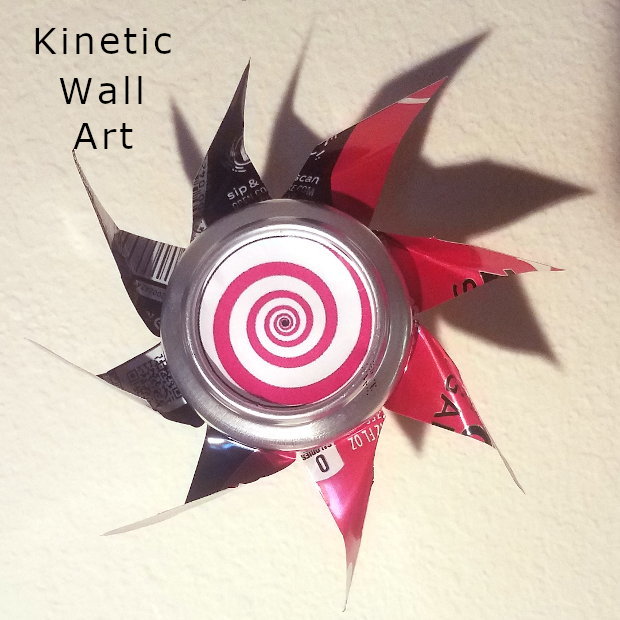
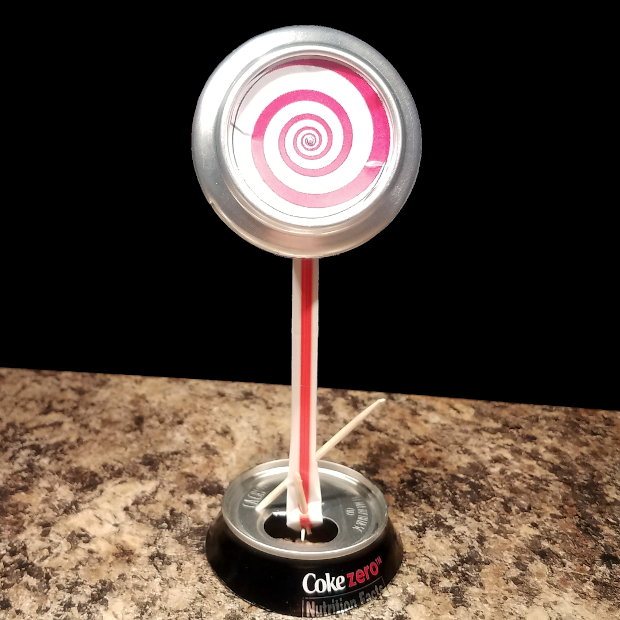
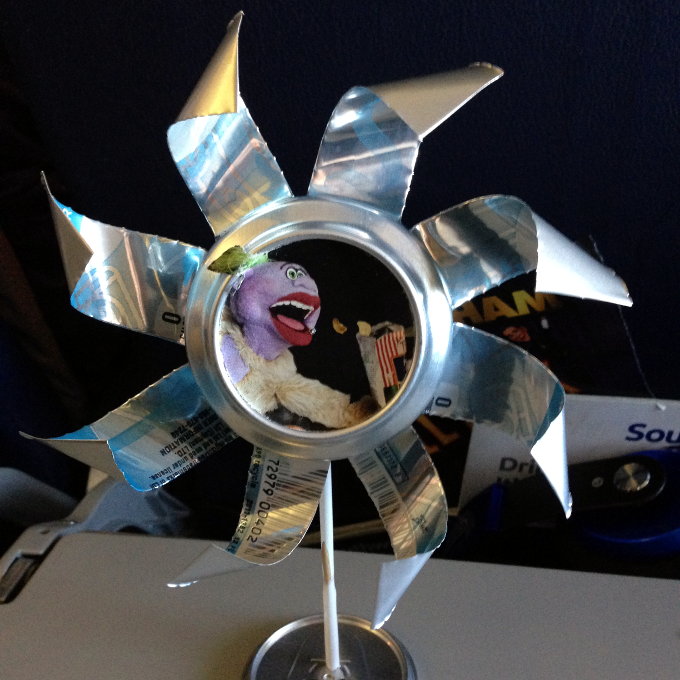
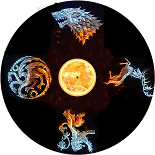
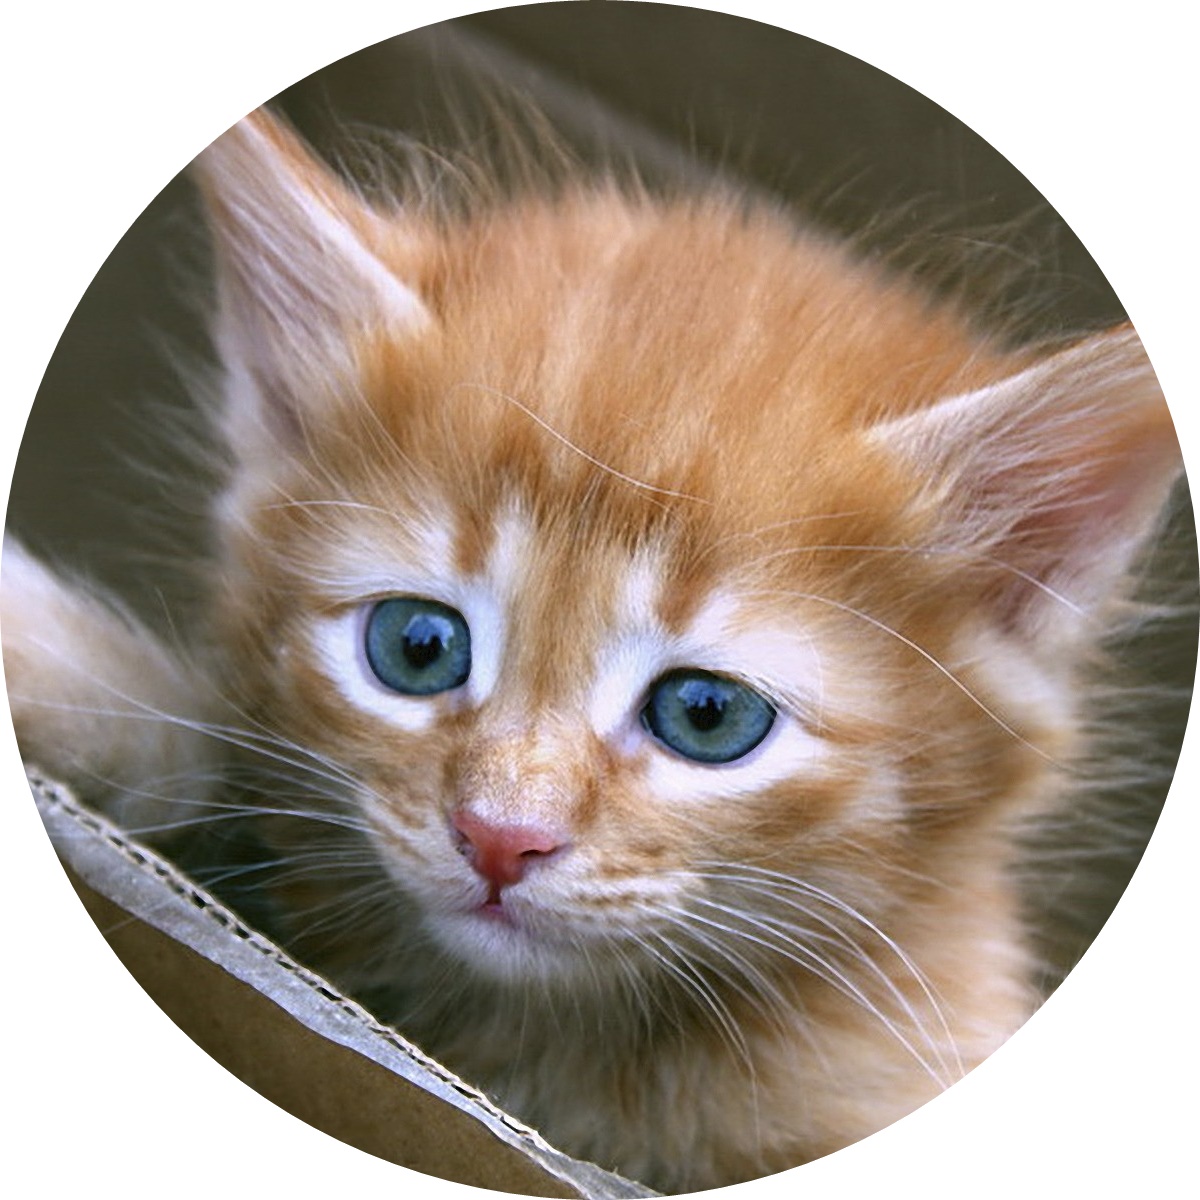
Image selection is a matter of taste, but I like colorful images that have a sense of rotation. For example, consider the spiral in the photos above. Or, the Muppet throwing-back chips into its mouth as the pinwheel spins. Also, feel free to extend slightly outside the borders of the wheel for effect -- like when I let the muppet's green hair fall outside the circle. When spinning a face, it's good to have the center fall exactly on a pupil, or the tip of the nose, or a bellybutton.
For your convenience, I've included a pdf file containing some center images for you to print out. I hope you like them. Be sure to print them at 100% scale in your pdf print settings.
Center Images.
You can design your own, personal center images from photos you have stored on your phone, laptop, or desktop. Just use this software I wrote to do it. You'll just switch out the triangle for the circle and save the finished result to your computer.
And here are examples of center images that you can download. If you download from the pdf file below, and if your printer is set to print at actual size, then they should be perfectly sized for a standard can.


Print it out at actual resolution, in a 1-to-1 ratio, by adjusting the output on your pdf print settings menu. If you're particular about your spirals, then there's a free web utility from Blocklayer.com for generating PNG copies of differnt spirals.
Don't forget to scent the paper image with cologne or perfume for an added touch of class.
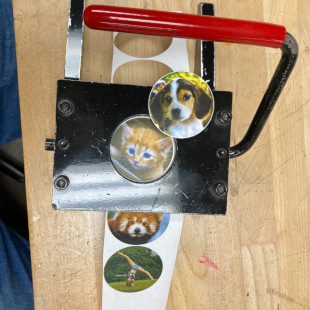
For perfect cuts, borrow a punch-cutter used for button-making.
Electrify It.
We do not yet sell the motors and connectors for making the electric pinwheel or the solar-powered pinwheel. Thank you for your patience.
If you are motivated nonetheless, you could purchase a pager motor at your local electronics store, along with the necessary wiring and battery casing, and solder and superglue this together yourself. [The eccentric weights that cause vibration are very, very difficult to remove without damaging the motor's shaft.] The solar cells and "Miller" solar engine components can be secured from Solarbotics, or perhaps you could cannibalize parts from solar lights bought from Home Depot or from a solar toy.
You can conceal the pager motor in a piece of straw held by a fuse clip and also run the wiring through the support straw and into the base, if you want to get fancy.
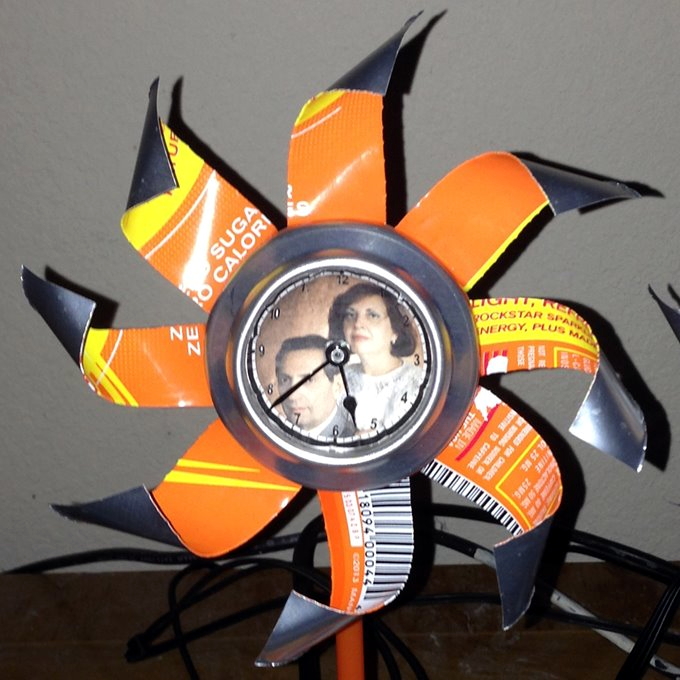
Clock It.
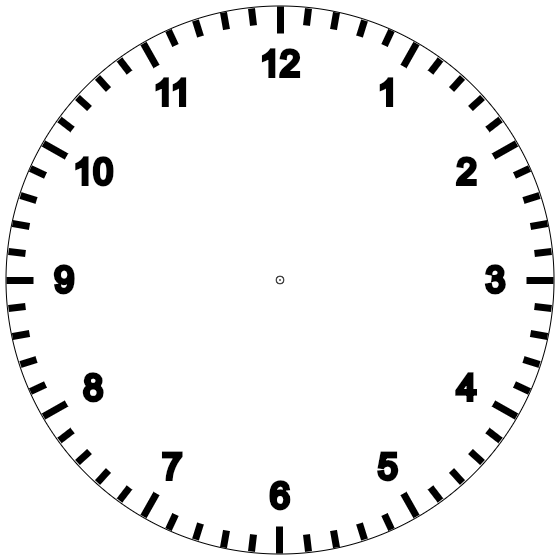
Print out an image of your choice with a clock-hands foreground that's sized to fit the well of the wheel. You'll need some skills with Gimp or Photoshop and it's layering function, sizing function, and transparency functions, but it's doable. The skills needed to do this are beyond what I'm capable of teaching in this website, but Youtube can teach you these essential life skills. If you just want a blank clock face, it's in this pdf. To order the clock mechanism, try Amazon or Klockit.
Blocklayer offers a free web-based utility for generating PNG copies of clock faces, with your personal photos in them.If you don't use Blocklayer, then you'll need to know how to work with layers in Photoshop, Gimp (free), or a similar program. The image below is a PNG image of a clock face, with transparency where your picture should display. The resolution of the clockface here is at 560 by 560, whereas your photo will be a different size; so you'll need to make your photo fit that (or vice versa). Also, you'll need to set the print size of your result to 1.75 inches (44 millimeters). You'll want to: