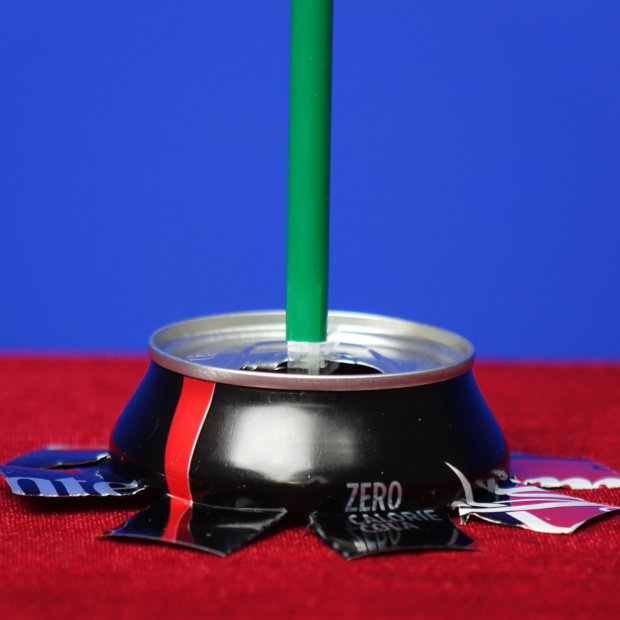
Making A Straw Stand
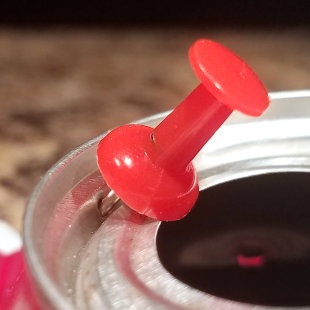
First remove the tab. Just bend it back and forth over a wide range of motion until the tab snaps off by itself. This is called "fatiguing" the metal. (Basically, metal can only bend back and forth over the same point until it gives up resisting your attempt to pull it apart.)
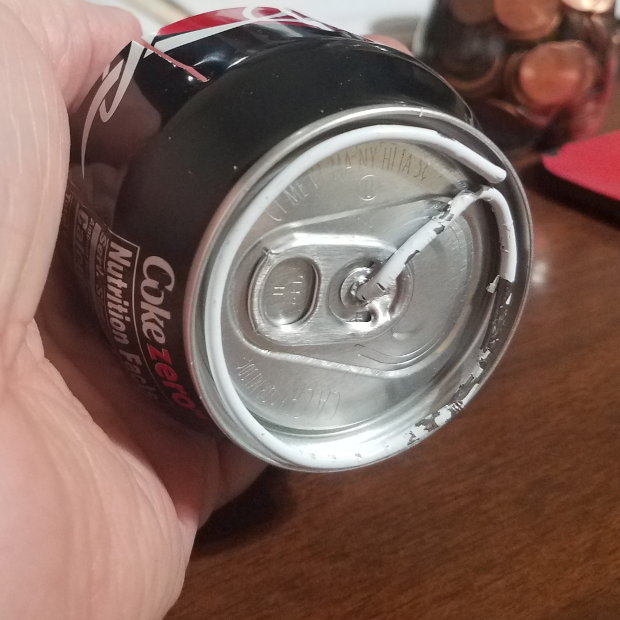
When you've removed the tab, sometimes a "C" shaped ring of metal remains locked around the pip in the very center of the can's top.
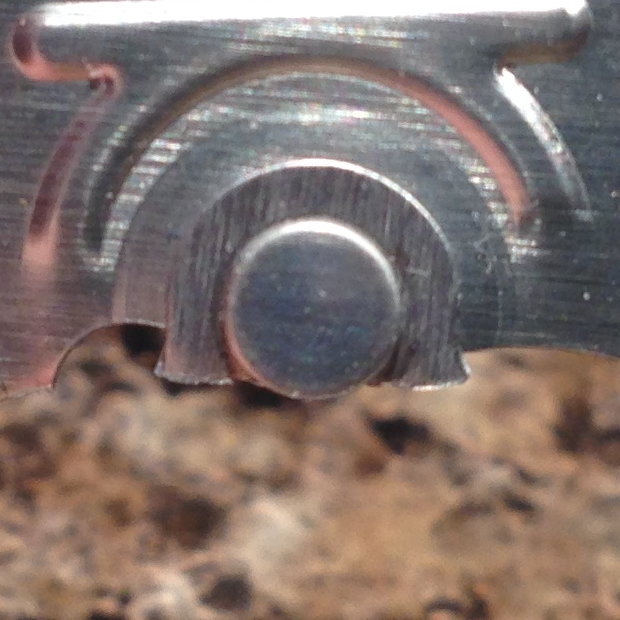
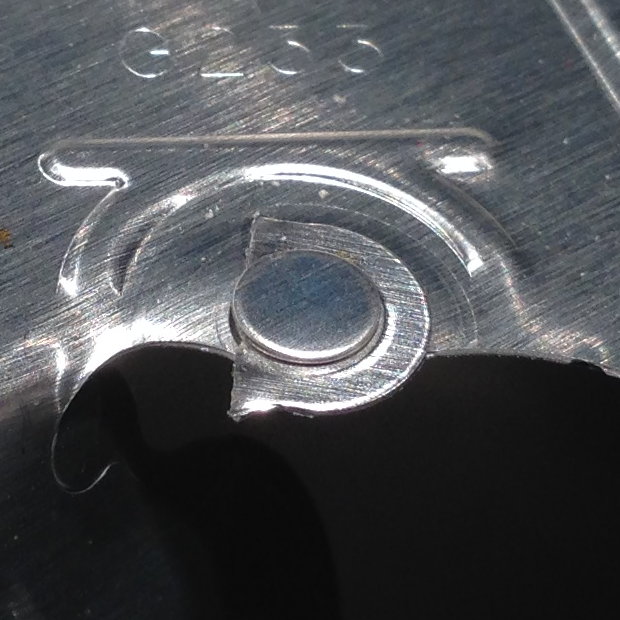
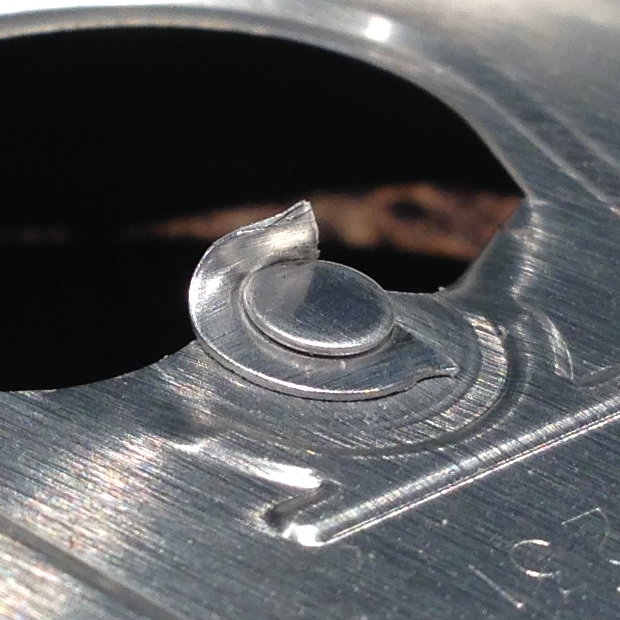
If you choose to remove it, just twist the ring around until part of it hangs over the hole, then use the opening in your tab as a tool to bend up the ring. Once it's bent up, it'll push off fairly easily.
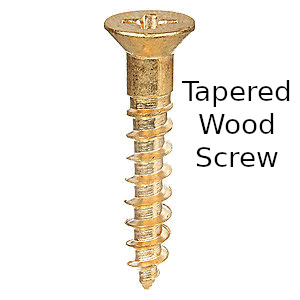
You have several good options for making the straw stand. The first option is to use a screw. You need to choose a screw whose head has a flat bearing surface instead of a tapered, countersunk head; and the threads should extend all the way up to the head. If that's confusing, these photos should clarify things.

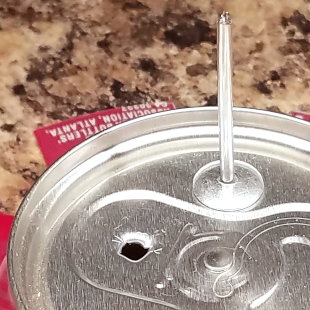
Use a pushpin to make a hole in the top of the can, preferable by punching from the inside-to-outside direction. Enlarge that hole with the punch, and then perhaps wider nails if necessary. Screw in a wood screw or sheet metal screw until its head rests snugly against the can's bottom, fixing the shaft in a perpendicular direction to the can's top. Be sure not to overtighten the screw, or it will over-enlarge the hole, causing the screw to spin loosely against the can, losing its holding power.
The screw will rarely be the same diameter as the straw. When the screw's diameter is too small, then you'll need to use a spacer to make the straw fit snugly against the threads. I find that one or more half-toothpicks can act as a spacer. Or, you can cut off a short length of straw, wrap it around the threads with a folded-over section that will try naturally to unfold itself, and fit the straw over it.
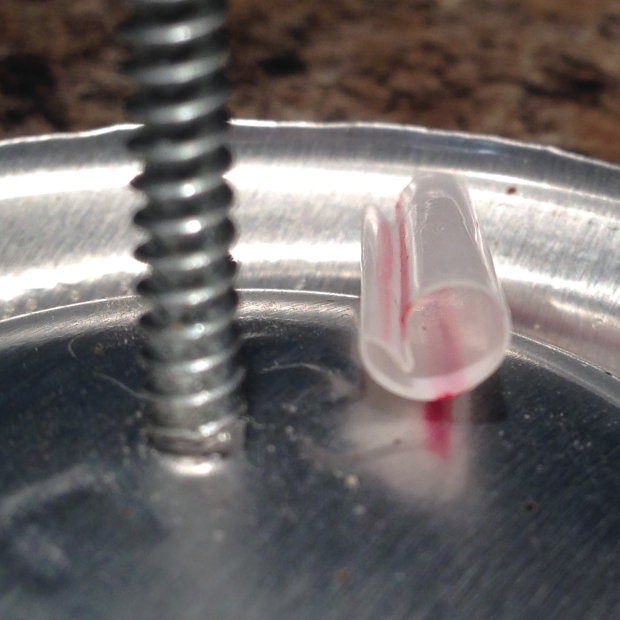
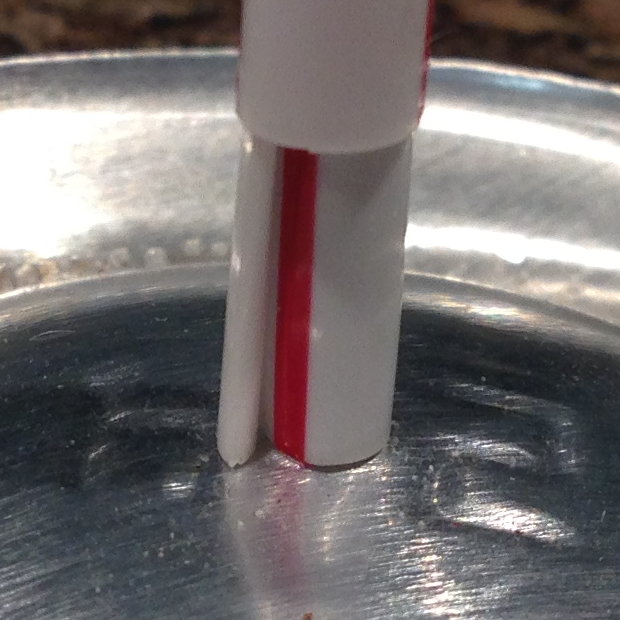
The pressure of the straw section trying to unfold will keep the outer straw pressed gently against the screw. If necessary, use several straw sections as spacers. If you've got the right diameter of screw and the right diameter of straw, then a segment or two of coffee straw will do the trick nicely.
The screw option is less than ideal because it can be difficult and tedious to twist-in the screw and because lateral pressure on the screw from rough handling over time will enlarge its hole. When that happens, there's no way to tighten the hole again, so the screw and straw will have a wobble.
The second option is to use a pop rivet and a quarter-inch-diameter, extruded-plastic masonry anchor (a "greenie").
Just make a hole in the can top, insert the rivet, cover it with the greenie, and use two toothpick halves as internal spacers as shown in this video.
As an alternative to the nail, you can make a starter hole with a pushpin in the desired spot. (If you lack the hand/finger strength to make the hole using the pushpin, try abrading the hole by twisting the pushpin tip against can-top while rotating it "back-and-forth" in a clockwise-counterclockwise direction.) Then knock-in the slider's tip with a hammer or similar handy object to enlarge the hole. The advantage of using the slider's tip is that you can insert the rivet using only finger pressure instead of a hammer.
Incidentally, if you used the nail, you may want to rotate it in a circle a bit to enlarge the hole slightly; this makes the rivet easier to insert, since the nail diameter is a bit small. Also, if you don't use a greenie, and hammer directly on the aluminum mandrel's tip, you'll just knock the mandrel out of the rivet body through the can, destroying the rivet.
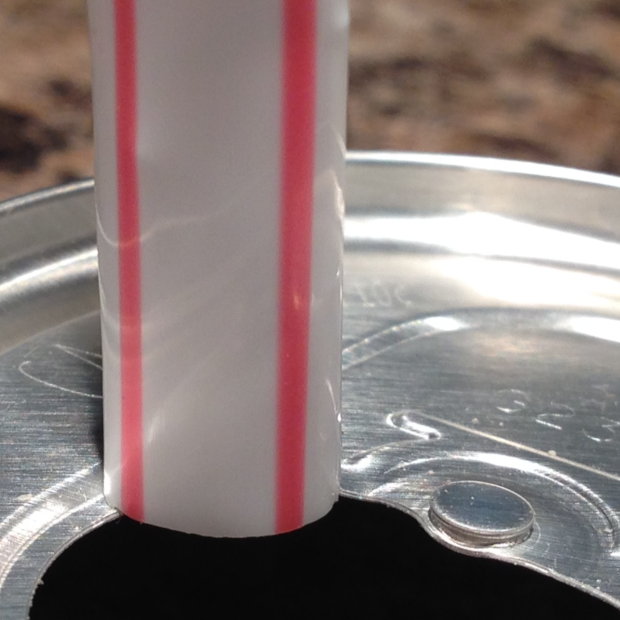
If you use a standard jumbo straw, the fit is very snug. If it's too difficult to get the straw over the greenie, you can put a small vertical slit in the bottom of the straw to enlarge it so you can get it started.
If you've run out of greenies, but still have rivets, then you can stuff a rolled-up tissue or paper napkin segment in the straw to act as a shim. Then insert the mandrel of the rivet up the bottom of straw along its inner side while still pinching the tissue or napkin in place.
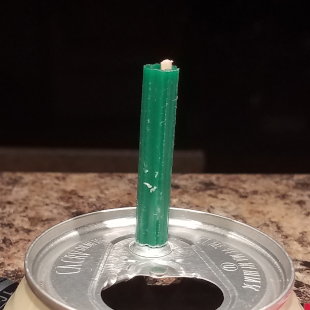
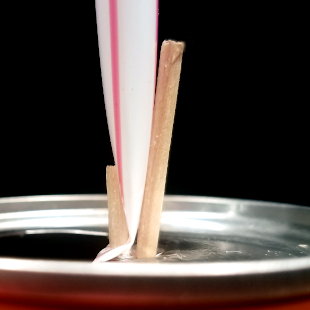
Another option is to combine steps 1 and 2 by using a red-sized wall anchor and a #5 screw (here, a picture hook with a #5 screw head). I've used a broken toothpick as a shim to tighten the straw against the red anchor.
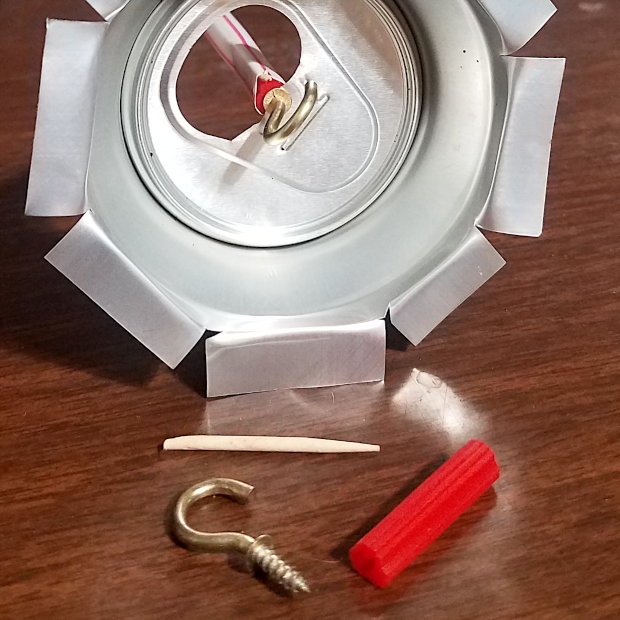
The center pip has very thin metal, so it's easy to puncture with the pushpin and enlarge with the screw. The red anchor option is a wobblier choice than using the green anchor and rivet, which has the wide flange on the rivet for enhanced stability, but it's easier to do.
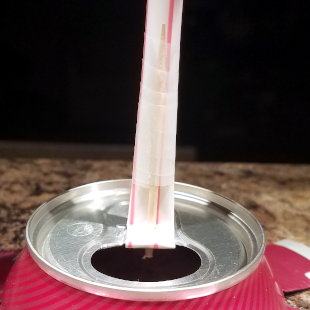
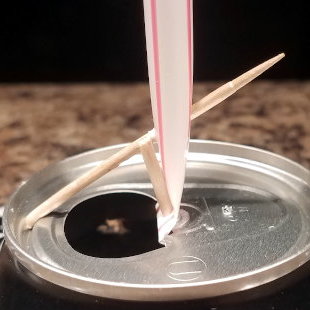
The third option is the cheap one: use toothpicks.
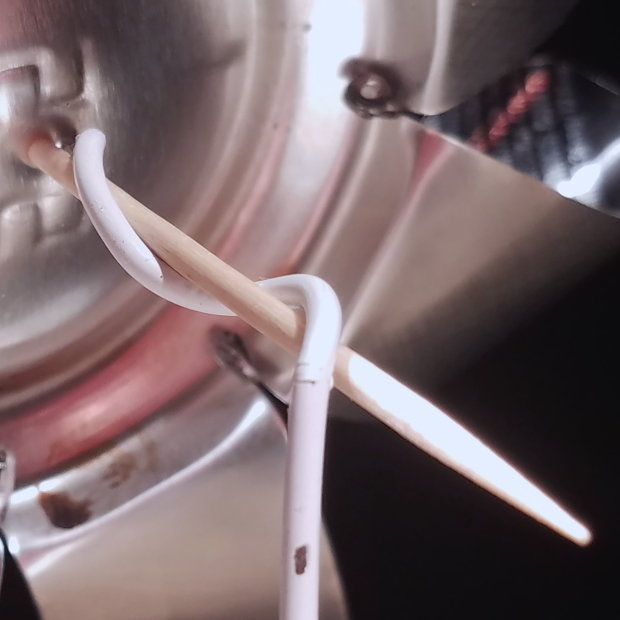
Use a pushpin to poke a hole in the very center of the base from the inside surface to the outside surface. Enlarge the hole to toothpick-size by using the punch – again by poking from the inside to the outside. Cut a wedge-shaped section out of the straw where you intend to fit it over the hole. For aesthetic and functional reasons, the flat part of the wedge should be resting against the top surface of the base. Position the wedge over the hole, then push a toothpick through the hole so it passes through the straw without being exposed. Push the toothpick far enough into the straw so that it won't hit the floor upon which the base will rest.
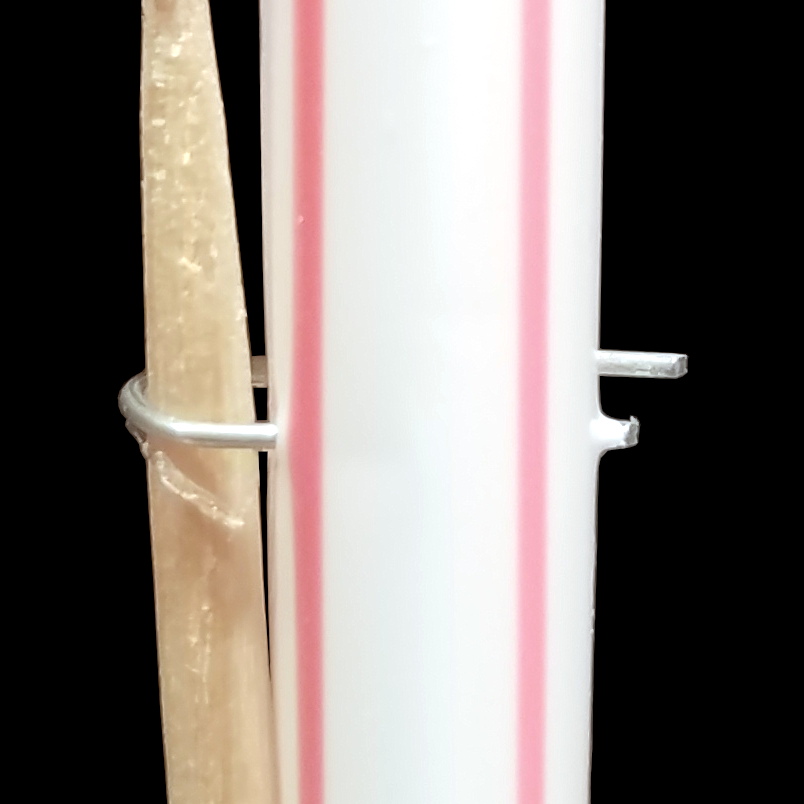
At this point, the straw will be secured to the base but will be wobbly. You can kill the wobble by spearing the straw into the base with another toothpick. Use your pushpin and punch as before to poke a hole completely through the straw. The holes should line up at about a 45 degree angle so that, when the straw is pointing straight up, the toothpick passing through the holes will intersect the base at a 45 degree angle.
The best way to make the second hole in the base is to pass the toothpick through the straw and see where the toothpick is going to pierce the metal when the straw is properly positioned. Pierce that spot with a pushpin. Don't pierce it at an angle; just push straight down with a lot of force, since the metal here is strong. Pierce it again with the punch to enlarge the hole – then tilt the punch so the hole it makes is twisted to line up with the toothpick.
Shove the toothpick firmly through the second hole. Don't slip and stab yourself in the center of your palm with the toothpick. Don't shove so hard that you splinter the toothpick into your fingers. Once the toothpick is inserted securely, you can clip off the pointy end with nail clippers if desired.
Here are two videos which have parts (at the 2:11 timemark and the 0:00 timemark respectively) showing how to make a toothpick straw stand:
A less stable, but faster and adequate method is to make this:
You'll insert the straw into the base, fold it over by about three-quarters of an inch, flatten it against the bottom, and pierce it with a pushpin.
Then fold-over the other end of the straw, flatten it a bit, pierce it with a pushpin, enlarge the pushpin hole to toothpick-size with the small nail or thumbtack, and then forcibly insert the toothpick. Then staple or tape the straw to the toothpick — making sure to expand out the bottom of the straw to its full circular shape as best you can.
Or combine the methods.
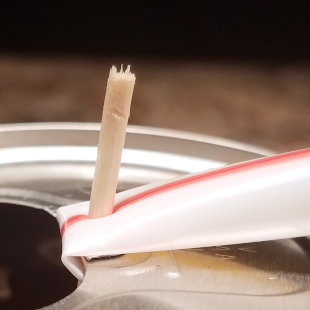

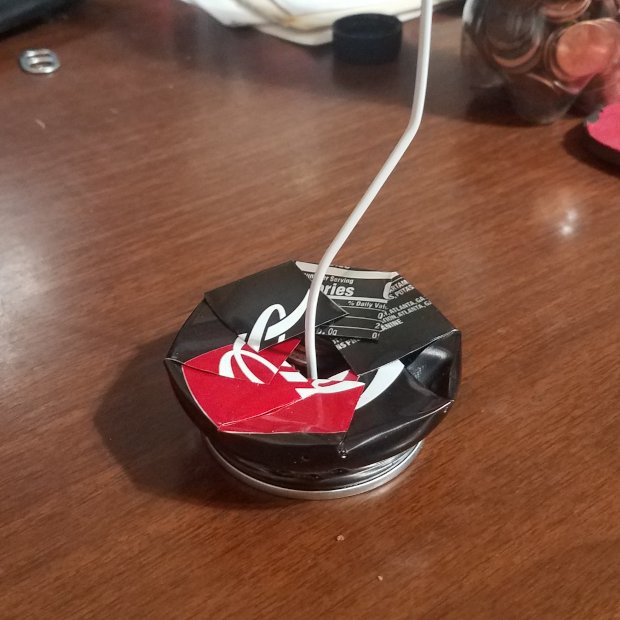
The fourth option is the lazy one. Bend the mouth cover up and fold it in thirds.
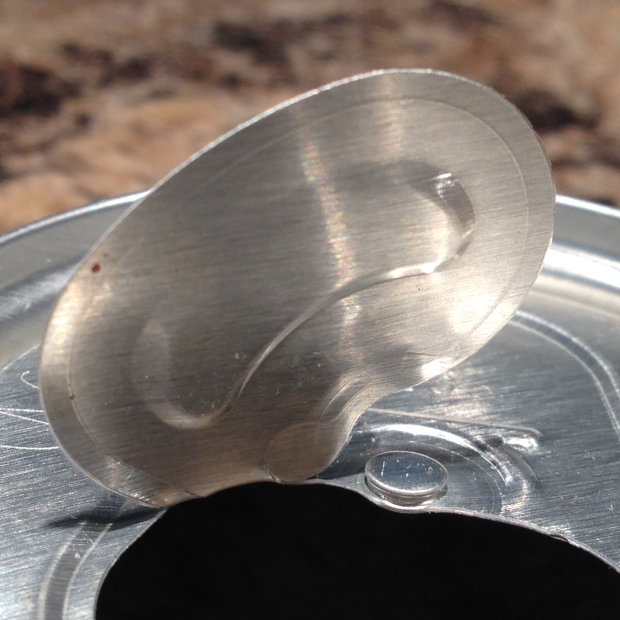
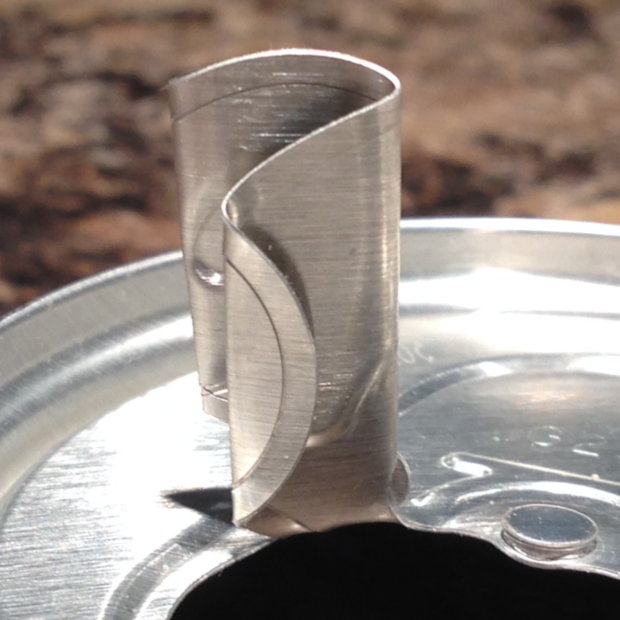
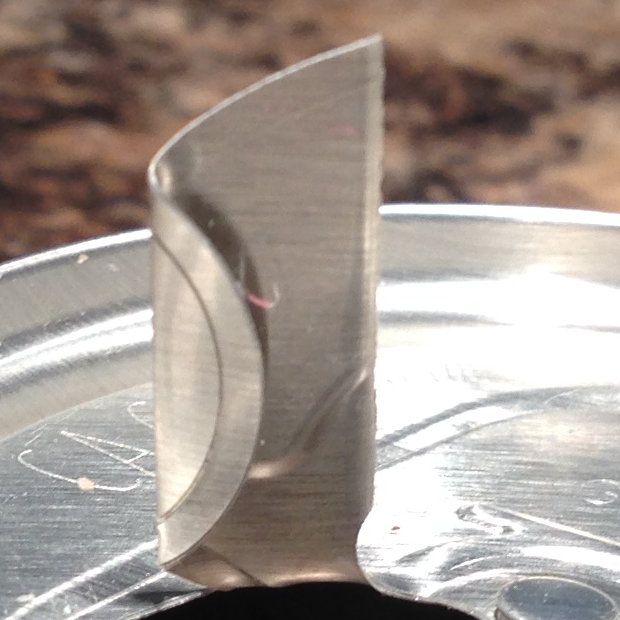
This method is fast, but the mouth cover isn't strongly connected to the can top and it can be difficult to get the straw to stick up at an angle perpendicular to the base. Also, it can be hard to fold-up the cover. You'll need to use the shaft of the slider as a brace to get the small bend started, and the bending requires considerable finger strength. You'll note in the last photo that I've used multiple half-toothpick segments as spacers to make it fit better. I've also wiggled-off (using metal fatigue) the large section of the tab to make it easier to fit the straw and half-toothpick segments.
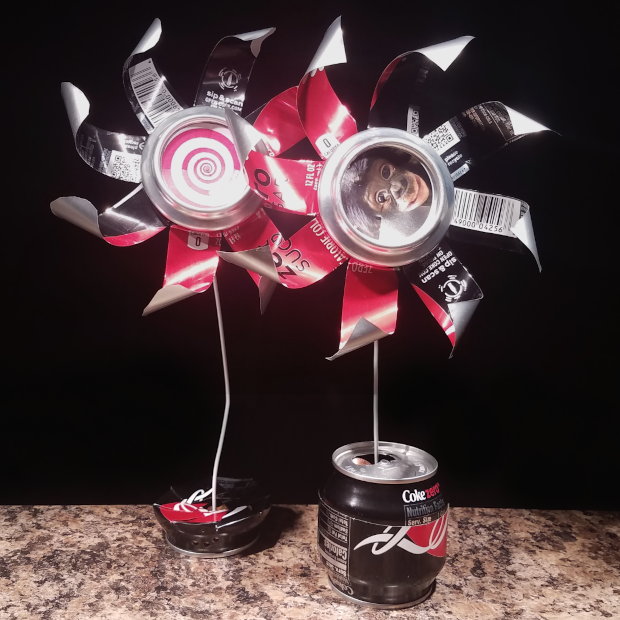
Incidentally, if you like, you can cut your main straw in half, or use multiple straws, to make a "telescoping" straw that can be lengthened or shortened at will. Or use a straw-within-a-straw to double up on its strength, if necessary.
This straw-stand design isn't very good, since it's easily knocked around into an odd position. Also, the "post" can weaken easily with repeated repositioning.
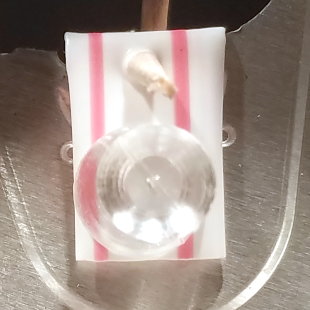
The fifth option is to bend hanger wire into an appropriate shape. I made the one on the right by bending straight wire around the upper rim of the can to make a few circles, then bending the remaining part so it stuck up.

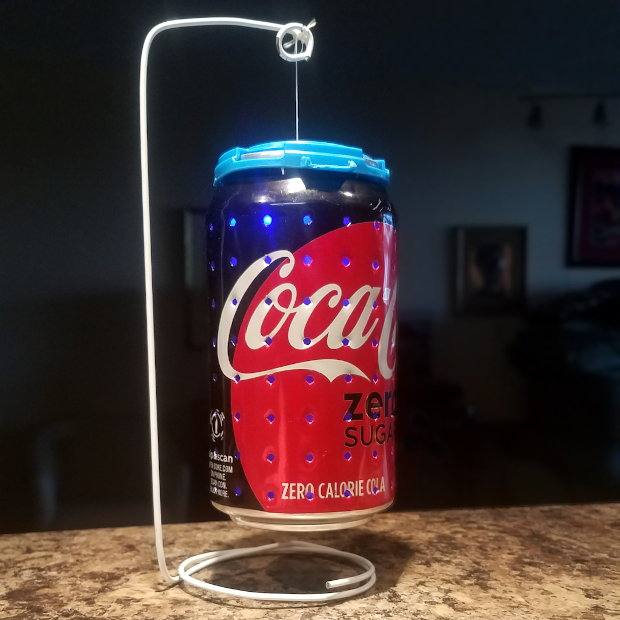
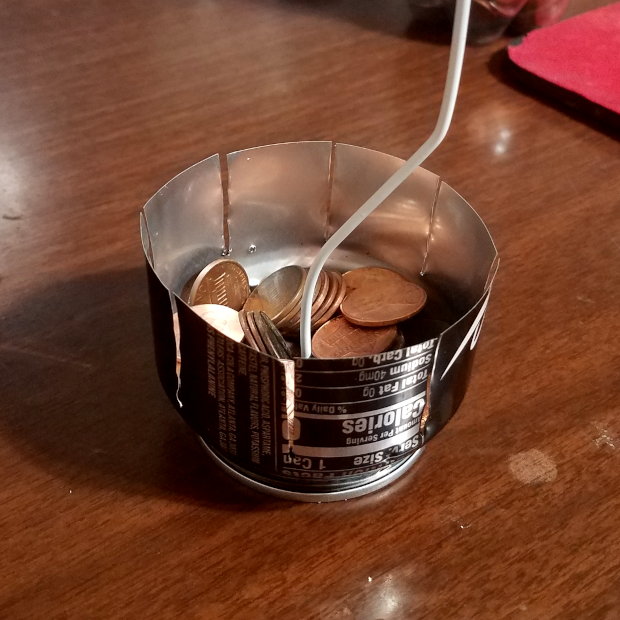
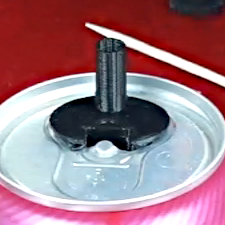
If you flip the cantop upside-down, you can fill it with pennies for stability:
If the wire is weighted down by pennies, sand, or dirt, then you don't have to pass it through the lid of the can. Note that you can also twist the upper part of the wire around a nail or screw to make the toothpick holder for the pinwheel:
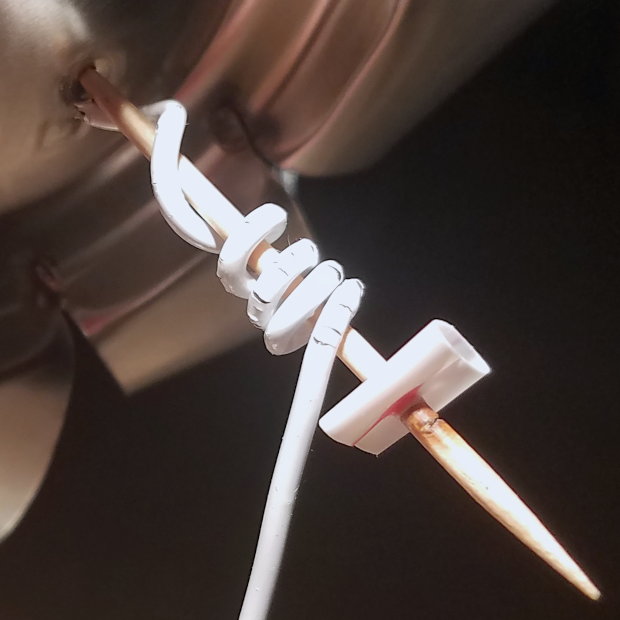
The sixth option (and the easiest one) is to 3D-print or laser-cut stands that can be snapped, screwed, pegged, or rotated into the base.
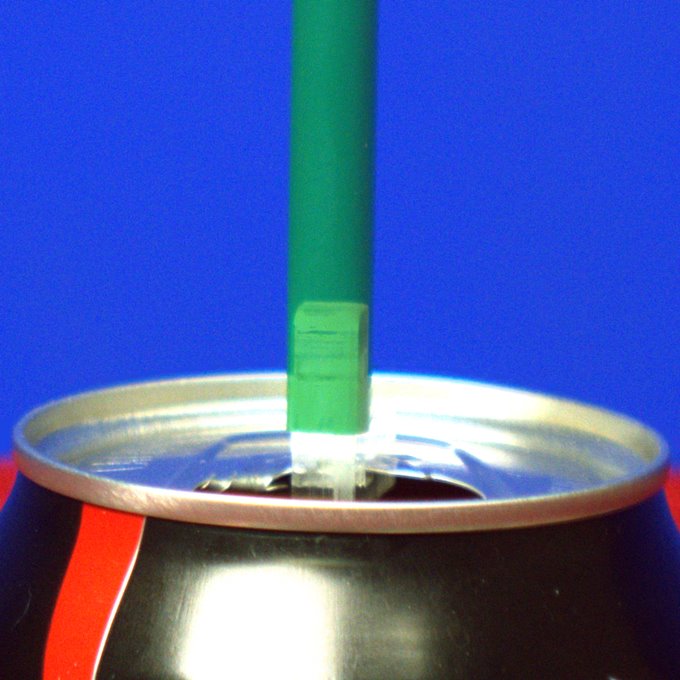
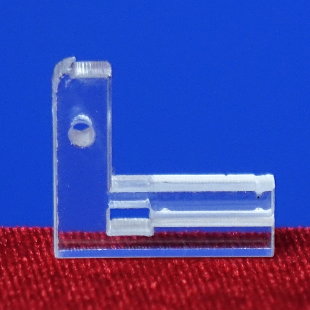
For the laser-cut stand, you'll drop the bottom end of the stand into the opening, then twist it so its slot slips over both sides of the top. Rotate and position it so that the large rectangular hole in the stand fits snugly over the center pip of the can. The straw is then pushed on the stand. The nice thing about this stand is that you can easily remove and replace the straw if desired. Also, the straw stand can be easily removed and transferred to your next pinwheel or other project. You can also lock the straw to the stand by poking a toothpick segment through the top hole in the stand.